Link a print queue to a profile
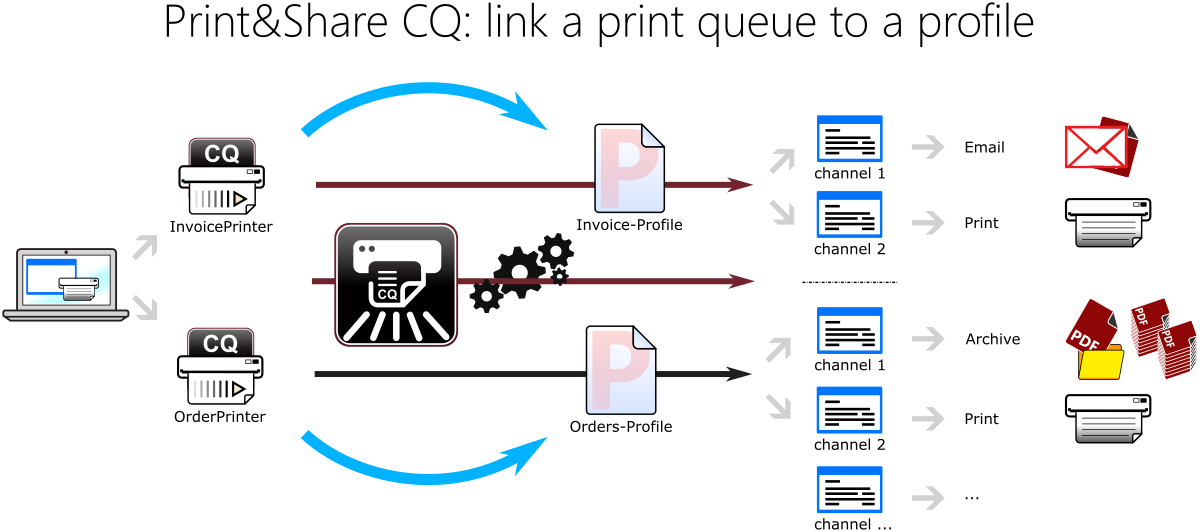
In this article we are going to explorer how you can create one or multiple Print&Share CQ printers (print queues) and link them to a specific profile. Everything that will be printed to that specific printer will be processed by that specific profile.
Configuration
First we are going to create two CQ printers:
- Log in to the admin panel of Print&Share CQ using a web browser.
- Navigate to
Manage > System Setup > CQ Printers. - Under XPS Printers (V4), click Add printer and give the name
InvoicePrinter.
Click Add printer again and give the nameOrderPrinter.
This will create two extra XPS Printers (V4).
Note: to make the printers available to end-users, you have to share them. You can read more here.
Next we are going to create two profiles, one to process invoices and one to process orders. Each will be linked to the specific printer/print queue.
- Navigate to
Manage > Workflow > Profiles. - Create a profile by clicking Create new and give the profile the name
InvoiceProfile. - Scroll down to the Channels section and add for example a Printer-channel.
(one or multiple different channels could be added to a profile, according your needs.) - Save all channel settings and get back the the main Profile page.
- Click Edit, next to the
Profile recognitionlabel. - Enable
Job printed toand selectInvoicePrinterand click Save. - Go back to the overview of all Profiles.
- Now do the same, create a new profile, give it the name
OrderProfile, add one or multiple channels and set the Profile recognition to theOrderPrinterfor theJob printed to-option.
Note: the order of the profiles is important. Make sure you set the profiles with profile recognition at the top in the profiles list. You can read more about this why on how to change the order here.