Preparing an Epson printer for Print&Share CQ
Print&Share CQ Smart Device Integration (SDI) can make Print&Share CQ available on an Epson printer.
Before we can install P&S CQ on the printer, we have to prepare it.
Follow the steps below to get started.
Start preparation
Enabling Epson Open Platform
Print&Share CQ with Epson SDI requires Epson Open Platform (OP). Therefore we need to activate and enable Epson OP.
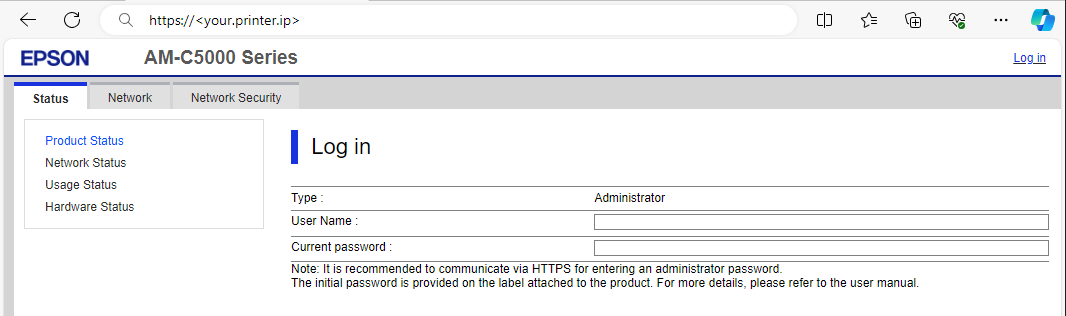
- Go to the Epson Web Config.
(http://<Printer IP address>without the<>) and log in as administrator.
- Go to
Status > Product statusand scroll down till you find Serial number and write it down. (e.g.: XAB1234567)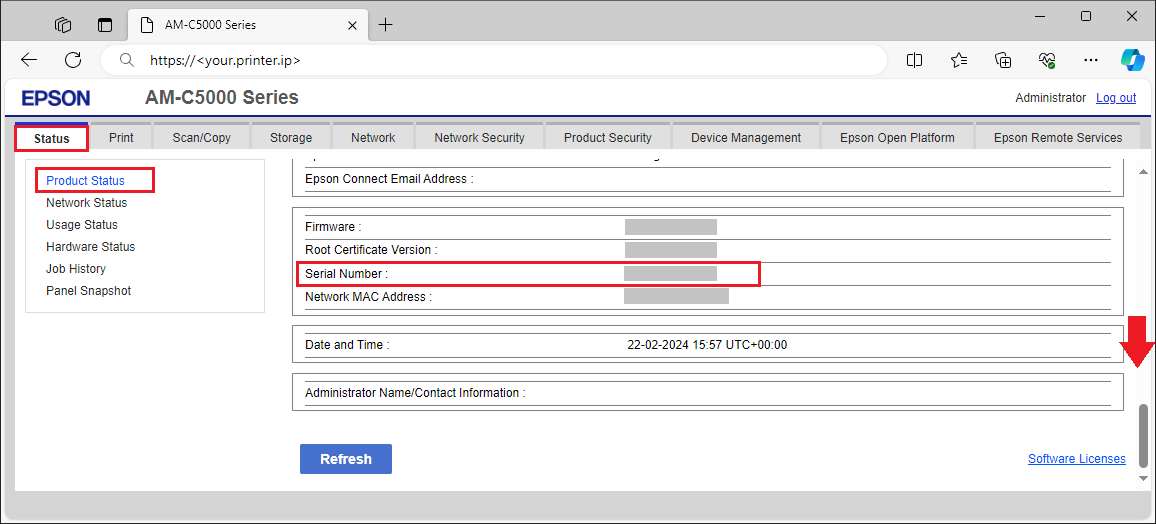
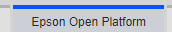
- Go to the [Epson Open Platform] section and navigate to Product Key or License Key.
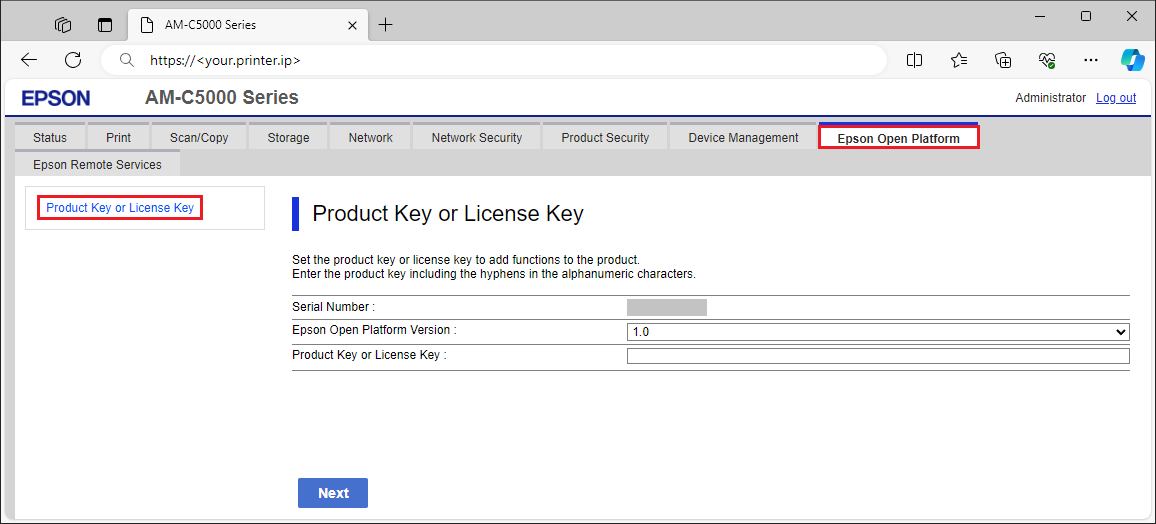
- If you don't see any Product Key or License Key here filled in we have to generate one.
Continue to follow the steps: - Navigate to https://openplatform.epson.biz/license-op/inputInformation.html
- Fill in the Serial number of the printer that you wrote down earlier.
Serial Number -> Enter manually(e.g.: XAB1234567).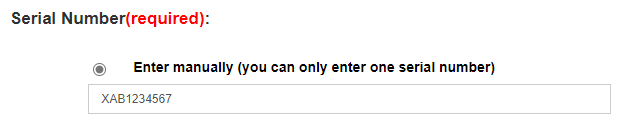
- Select your Country/Region
- Main use for application: Select
Print&Share CQor if you don't see it: chooseOtherand fill inPrint&Share CQ.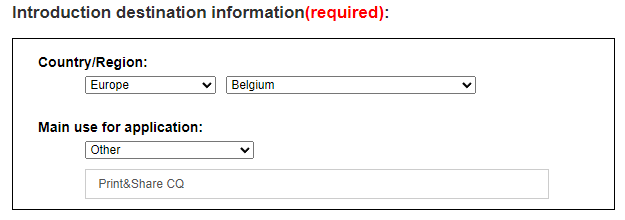
- Click Next, verify the info and click Issue.
- Save the product key(s).
- Go back to the
Epson Web Config > Epson Open Platform > Product Key or License Keypage. - Set the Epson Open Platform Version to
1.1.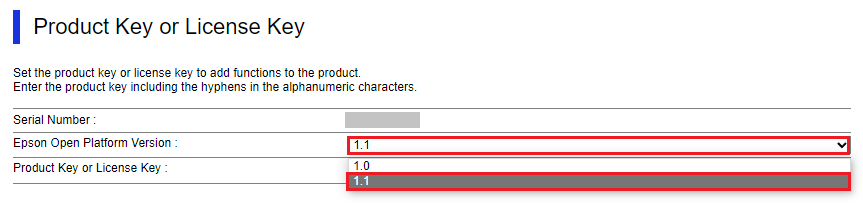
- Fill in the Product Key or License Key that you just generated and click Next.
- Confirm your settings by clicking OK.
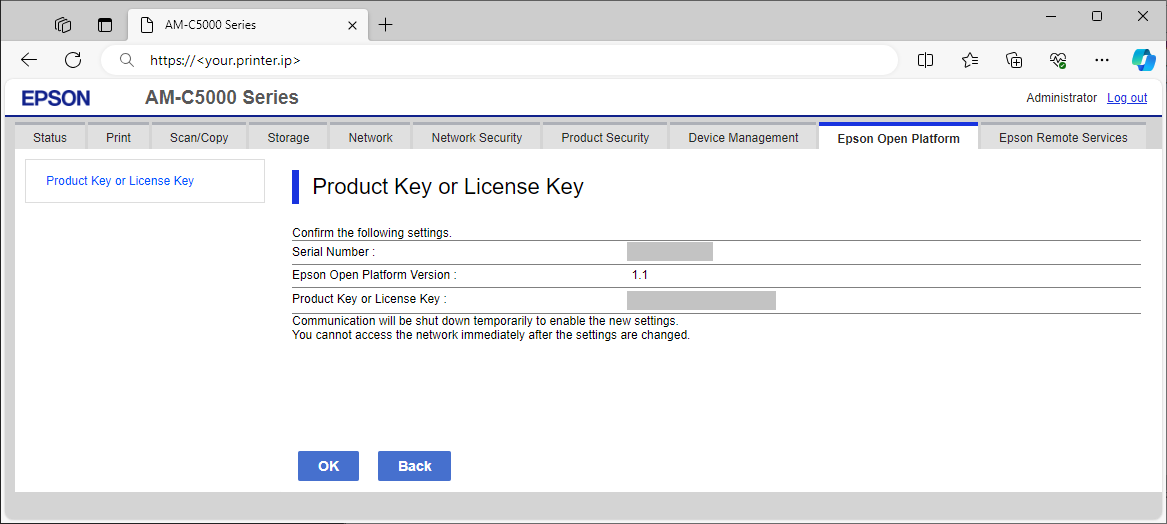
- Your printer will now shut down and restart.
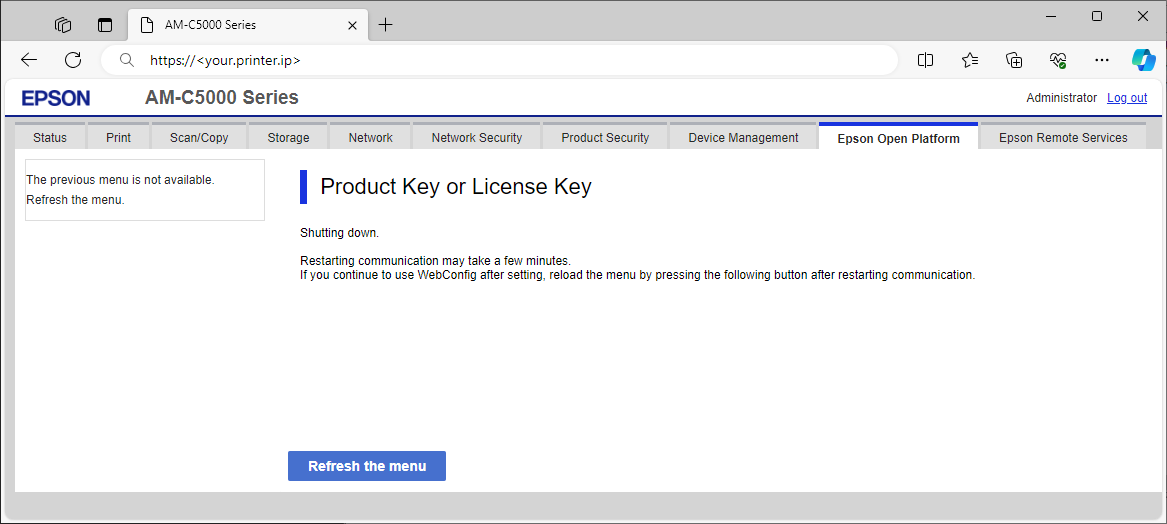
When Epson Open Platform is activated, you should be able to see Authentication System in the left side menu.
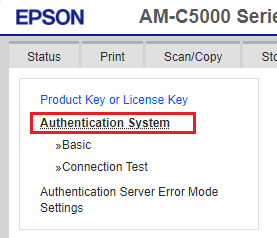
Now you can continue with Epson Smart Device Integration (SDI) setup.