Xerox Smart Device Integration (SDI) setup
This article will guide you with the setup of Print&Share CQ Smart Device Integration for Xerox.
We asume this is a default (factory reset) device.
Configuration
- Make sure the Xerox printers are installed on the Windows Server by installing the specific Xerox drivers for your Xerox printer model(s). Normally this is on the server where P&S CQ is installed.
(These printer drivers can be found at the Xerox website.) - In P&S CQ navigate to
Manage > Smart Device Integration > General. - Enable shared folder, select
Predefined shared folderand selectCustomfor Share user and fill in theUsername,Passwordof a local user and leave theDomain-field of the local user empty.
Creating a local userprintandsharecq:
(How to create a local user in Windows.)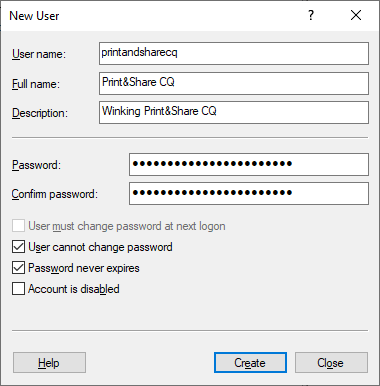
Note: with Xerox we had more success with a local user instead of a domain user for the Predefined shared folder.
- Navigate to
Manage > Smart Device Integration > Xerox.
Here you should see all Xerox printers. Every Xerox printer in that overview should have an IP address asigned to it, so that P&S CQ can communicate with it. You can asign an IP address to a printer inManage > Output > Printers. - Now we will configure P&S CQ on the Xerox printer. In
Manage > Smart Device Integration > Xeroxselect a printer and edit it. Fill in the deviceUsername,Password.
Optional: when using batch key card authentication you should Enable theConvenience authentication. - For Desired actions select Print&Share CQ app:
Installand Apply.
If everything is configured correctly, you now have Smart Device Integration for Xerox configured on the device.
Administrators can further control and secure the Xerox printers (e.g. by disabling Direct WiFi, ...)