This page will guide you through the installation of Print&Share CQ (P&S CQ) on a server.
Print&Share CQ can be installed on desktop or on server systems, however the logical environment would be a server. The server should be in a Windows domain.
1. System requirements
Print&Share CQ requires .NET 10 as a minimum and .NET Framework 4.8: Download here.
You can consult the Microsoft website for more information about the:
- .NET system requirements (#2)
- .NET Framework system requirements
- A modern web browser (Edge, FireFox, Chrome), not Internet Explorer.
- Server/computer should be in a Windows domain.
- In case of Tesseract OCR: MVC++ Redistributable packages
- (optionally) Microsoft SQL Server (Express)
2. Setup
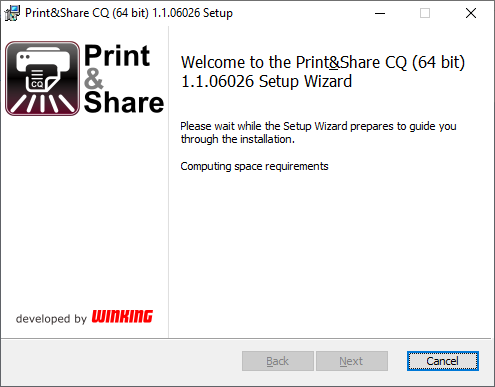
- Start the executable (.exe) and follow the installation wizard.
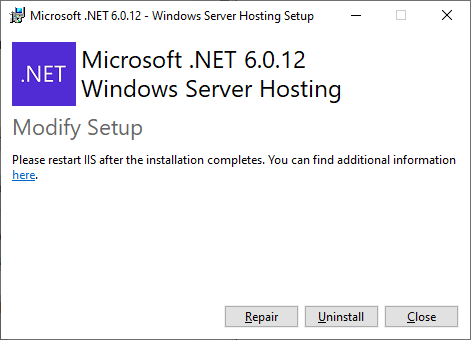
- The setup will check if the required Microsoft components are installed. They will check and if missing install each component.
If a Microsoft/.net component is not yet installed, follow the instructions to Install the missing component(s).
If a Microsoft/.net component is already installed, you will see Repair, Uninstall and Close. Click Close to dismiss the dialog.
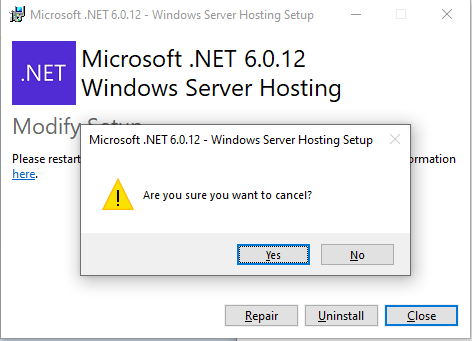
Are you sure you want to cancel?click Yes
(Version my differ from the screenshots. Only to demonstrate the process.)
- Click Next on the Welcome-dialog of the Print&Share CQ.
- Read and accept the license agreement.
- The Print&Share CQ service component will be installed.
- By default the service runs under the Local System account. You can leave this as default, or specify a dedicated user to run the service. In case of selecting a dedicated user, the user must have proper permissions.
- Next the ports that will be used to access the Portal via a web browser using HTTP (
631) and HTTPS (4433). Leave them as default. (Older versions used HTTP (800)) - Install legacy printer. Enabling this checkbox will allow Print&Share CQ to support PCL5 RAW print jobs.
- Click Install and wait untill the wizard finishes.
After installation, a web browser session will start and show the Print&Share CQ Portal.
3. Print&Share CQ Portal
Follow these steps to open the P&S CQ Portal page:
Method 1:
- Open a web browser.
- Navigate to
http://127.0.0.1:631orhttps://127.0.0.1:4433.
(older versions used port:800or use specific ports in case you changed them.)
optionally: in many cases instead of127.0.0.1you could also uselocalhostorserverhostname.
Method 2:
- Go to Windows Start menu or press WINDOWS KEY.
- Search for
Print&Share CQ Portal
Method 3:
- Go to your Windows Desktop or press WINDOWS KEY + D.
- Double click the
Print&Share CQ Portaldesktop icon.
4. Database
By default Print&Share CQ is using LocalDB to store its data.
A connection to Microsoft SQL Server (Express) can be made. In case you want to use MS SQL Server, either install it or make a connection available.
After the installation of Print&Share CQ, we recommend changing to MS SQL Server if you want to use this type of database. In case you change the connection later, all your settings and configurations will be lost, because you start with a fresh database.
Change to MS SQL Server database
- Login to the Print&Share CQ Portal.
- Navigate to
Manage > System settings > Database connection - Fill in the connection details and the initial catalog (database name).
Print&Share CQ will automatically create the database with the provided name and create all tables.
For more details see Changing the underlaying database