1. Add a channel
Once you are connected to a the File Processor service for the first time, there will be no File Processor channels. In this document we will explain how to create a File Processor channel.
For simplicity we will use the term "channel" instead of "File Processor channel".
- Start the File Processor client
- Connect to the File Processor service
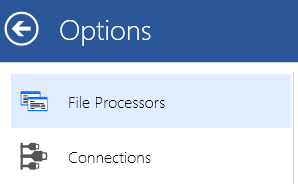
- Go to [Options]

- Select [File Processors] to see the overview of all file processors.
- Click the [Add File Processor] button to create and add a new File Processor.

Now you should see a dialog to configure your channel which we will configure in a next step. Adding a new File Processor Channel is child's play.
2. Configure a channel
A File Processor channel can be best compared with a task that should be executed. A channel consists of building blocks which are always executed in the same order. These building blocks are:
- Scheduler
- Input
- Input Filter
- Conversion
- User Impersonation
- Output
- Post-Actions

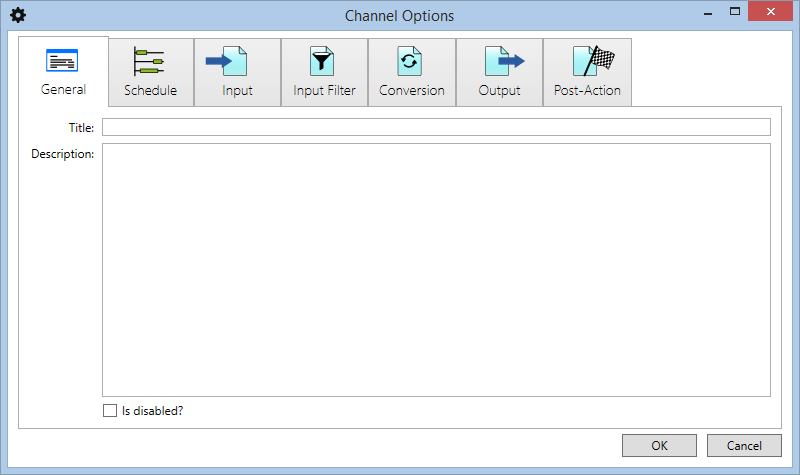
These building blocks are visible in the Channel Options dialog in the same order:
In this example we will create a File Processor channel which monitors a folder for incoming text files (.txt). These text files will then be renamed and moved to another directory.
General
here you can define a title and description. When you have many channels configured, you will be happy with this extra information.
The [Is disabled?] checkbox can enable or disable a channel. When disabled it will not monitor and thus not process any files.
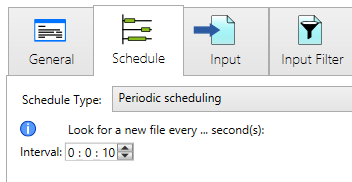
Schedule
This is the place where you configure when the channel should monitor. Set it to periodic scheduling with an interval of 10 seconds.
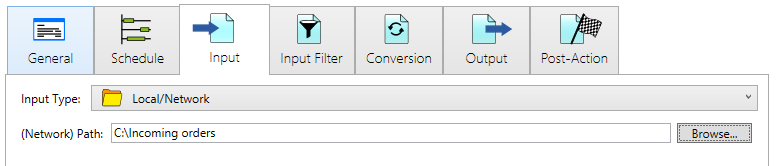
Input
Here we define which location we want to monitor. This can be a network folder, mailbox, FTP, ... For now we will select [Local/Network] to monitor a folder. Click the [Browse...] button and select a location.
Note that this is a folder on the pc or server where the File Processor service is running! Remember that the File Processor client is an application that connects to the service. In most cases this service is running on a server. That is why you will see only directories which are visible and accessible on the server.
Input Filter
Optionally we can filter the incoming files. In this example we will create a filter to only process .txt files.
- Click the [+] button to add a new filter
- Set the filter type to [Property] and add it
- Select [File Name] and [MatchRegex], because we will use a regular expression (regex) to filter out the files. (More info on regular expressions)
- Fill in this regex:
.*[.]txt
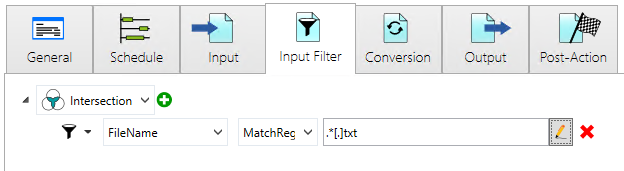
By clicking the Pencil icon, you can test and edit your regular expression.
Conversion
In the conversion section you can modify and convert the original input.
As an exercise we will add a converter to rename our text files.
- Click [Add Converter]
- Select the [Rename files] converter
- Click [Add], [Property (Parameter)]
- Select [File Name] as property and click [OK]
- Now change the Rename to:
Processed $[FileName-1]
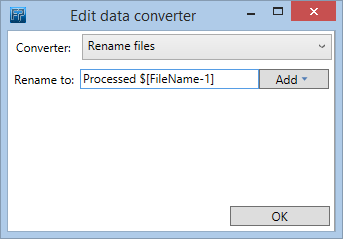
- Your result should be similar to this:

User Impersonation
The User Impersonation-section was added later in more recent versions of File Processor. This section is mostly used in specific cases. For now we will skip this section.
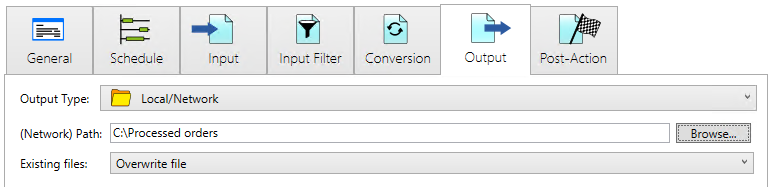
Output
In the Output section you can define the location where the files should be set.
For this example we will use [Local/Network] again to place our files in a different folder. This is similar of how we configured the Input. Configure it to another directory
We have an extra option where we can control what should happen in case the file already exists. For now we will use the default [Overwrite file].
Your result should be similar to this:
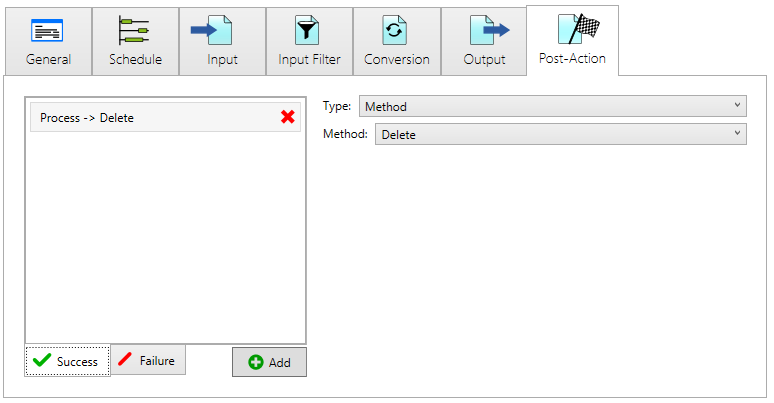
Post-Action
Post-Actions define what should happen with the input data after a file is processed. This is separated in two lists: what should happen with the original input file after a successful processing or after a failed processing.
Post-Actions can be methods or dataprocessors. A dataprocessor can be an Output again. This allows creating complex workflows.
For now we will use the default and delete the original file from the input directory, otherwise we would have an endless loop of processing the same file(s) again.
Final steps
After clicking [OK] to close the channel we will now have our first File Processor channel.

To edit your file processor select it in the overview and click the pencil icon.
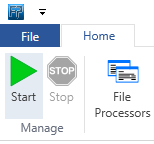
Now we can go to our main view, the File Processor overview, by clicking [File Processors] in the ribbon:
3. Testing
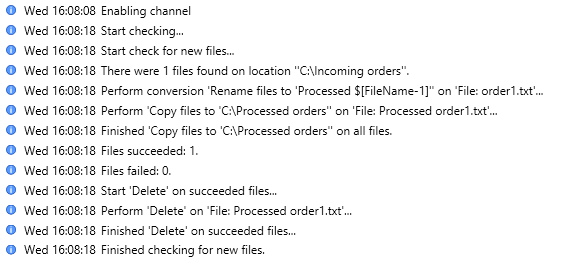
We have our first channel now, let's test what we've configured!
- Make sure you are connected to the service
- Go to the configured Input directory (e.g. C:\Incoming Orders)
- Create a new text file in the directory and call it order1.txt.

- Click [Start] to start the monitoring process. Each (enabled) configured channel will now monitor for files according to its defined schedule.
If all is fine, you should see activity in your File Processor channel and your file should be moved to your output director (e.g. C:\Processed orders) with its new name.