In this case, we combine two or more print jobs in one output.
This could allow you to combine separate print jobs into a single print job in order to staple the combined output document.
Another example could be bringing two or more documents together for making a booklet on your RICOH MFP.
By following this example you will learn how to use the Combine Printouts feature.
Print&Share configuration
Please follow the steps to build this case:
- Create a new profile with a single printer channel.
- Go to the General-tab page of the Profile dialog.
- Change the Output: option to
Documents are combined into one transmission.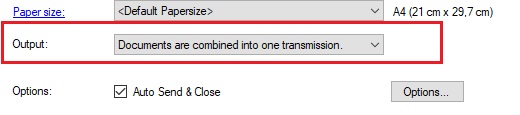 </br
</br - Close the dialogs by clicking the OK buttons.
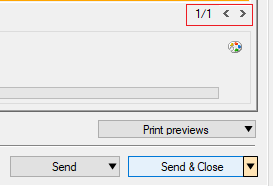
When you open e.g. Microsoft Word and a print a single-page document to Print&Share, you will see that the number of pages is set to 1/1:
...and the Loaded document(s): are set to 1/1:
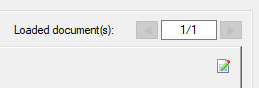
Now open Microsoft Word again and print another single-page document to Print&Share, you will notice that the number of pages has been changed to 1/2 but the Loaded document(s): are still set to 1/1:

We successfully combined two print jobs into a single print job by using Print&Share!
How to combine per two print jobs?
If you have followed the configuration above, you will notice when you print each time to Print&Share, it keeps on combining all print jobs to a single print job.
Ofcourse we would like to add a trigger that could start a new print job combination.
The solution for this is configuring Auto Send&Close.
We will configure Print&Share so that it automatically processes (read: prints) the combined job, after it has combined two print jobs.
In other words: if you send two print jobs to Print&Share it will process the combined document. If you send a third print job, Print&Share will wait untill it receives another print job to be combined.
- With the profile created in previous steps, go again to the General-tab page of the Profile dialog.
- Enable the checkbox for Auto Send & Close.
- Click on the Options... button next to Auto Send & Close.
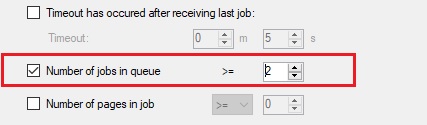
- Enable the checkbox for Enable auto send when:
- Enable the checkbox for Number of jobs in queue and set the value to 2.
- Close the dialogs by clicking the OK buttons.
Now when printing two print jobs to Print&Share, you will notice that Print&Share automatically processes the jobs and closes.
This case shows the basic usage of the Auto Send & Close feature. Many options could be configured to create your desired document workflow.
Tip: When using Auto Send & Close, you might want to mark the profile as default. Unless you are working with Profile Recognition.