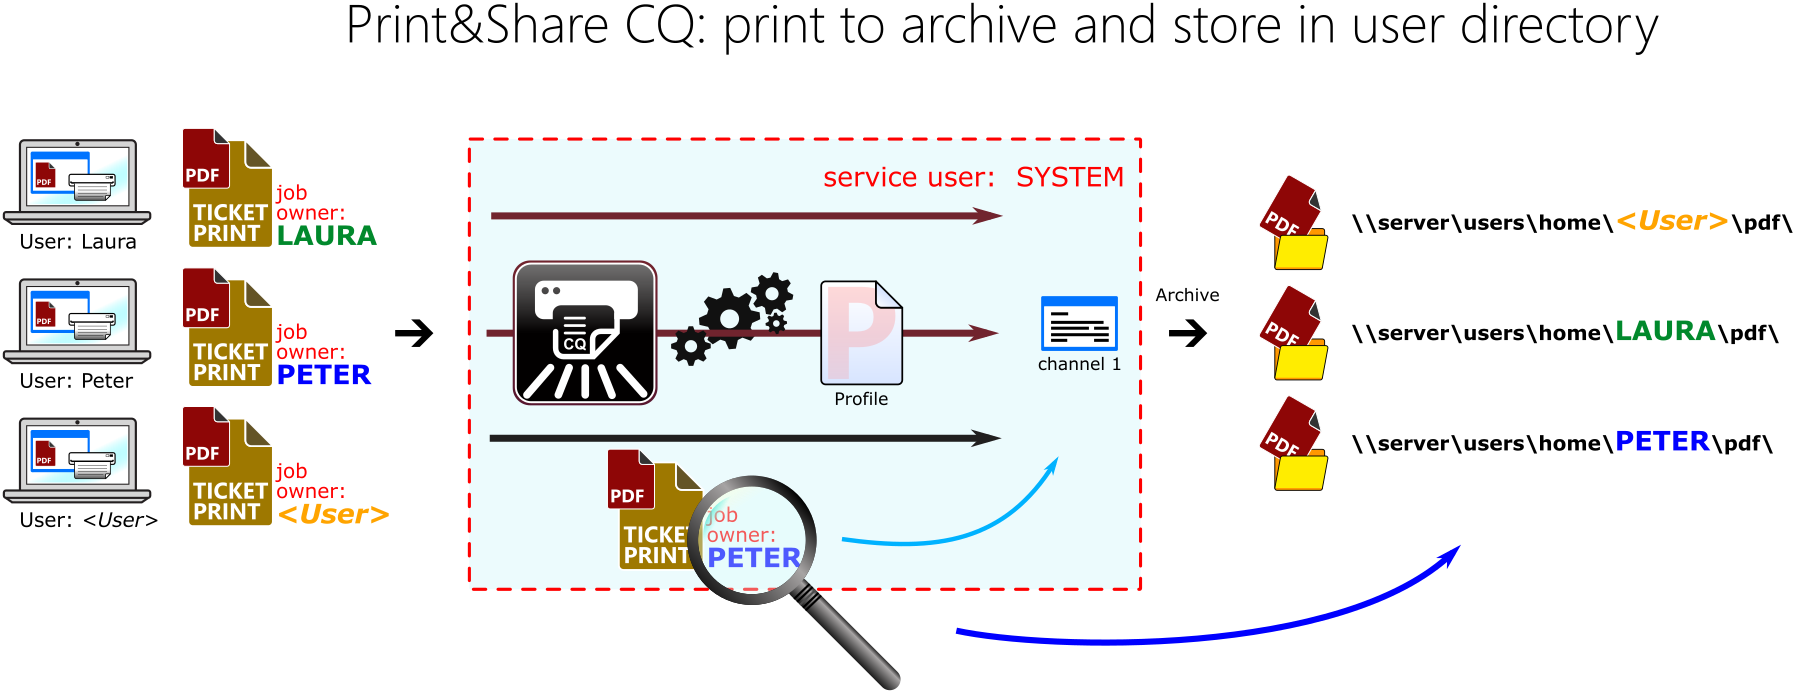
In this article we are going to explain how you can configure Print&Share CQ so that every print job from a user is archived on a central server in the users' home directory. A print-to-archive in a specific user folder.
Configuration
Preparing Print&Share CQ
First, for demonstration purposes, we are going to setup Print&Share CQ with a single profiIe. This profile will have one file print channel. In a next section, we will do the actual user impersonation configuration.
1. Creating a new profile
- Log in to the admin panel of Print&Share CQ using a web browser.
- Navigate to
Manage > Workflow > Profiles. - Create a profile by clicking Create new and give the profile the name
Print to user archive. - Scroll down to the Channels section and add a File Printer-channel.
- Configure the Printer-channel with a specific printer.
- Save all settings and go back to the overview of all Profiles.
2. Configuring the channel
- Go to the newly created profile
Print to user archive. - Scroll down to the Channels section and edit the File Printer-channel.
- At the bottom in the File Settings section we need to choose a file destionation where to save the file.
Click the edit button to change the File destination:.
(Remember that we will create a dynamic path that will use a recognition for the user-part in the path.) - Fill in the path. Of course your path will be different in your example.
Our goal is to create a path like\\server\users\home\<USERNAME>\pdf\.
Therefor we will first write\\server\users\home\ - Now click on the + and select
Add parameter - Change Recognition type to
Job propertyand select for Property the optionJob ownerand click OK to close the dialog. - If you did everything correctly you will now see:
\\server\users\home\@[CContent-1].
All we have to do is now add the final part of the path by adding\pdf\.
Your folder path should look like\\server\users\home\@[CContent-1]\pdf\.
Click OK to close the Choose path-dialog. - Now we have filled in the File destination for our File channel. Go to the top of the page and click Save to save everything.
Testing
If you share the PSCQ V4 printer now to your users, and let them print something from e.g. Notepad. You will notice that on the location \\server\users\home\<USERNAME>\pdf\ the printed documents will be archived as PDF files and stored automatically in the home directory of the user.