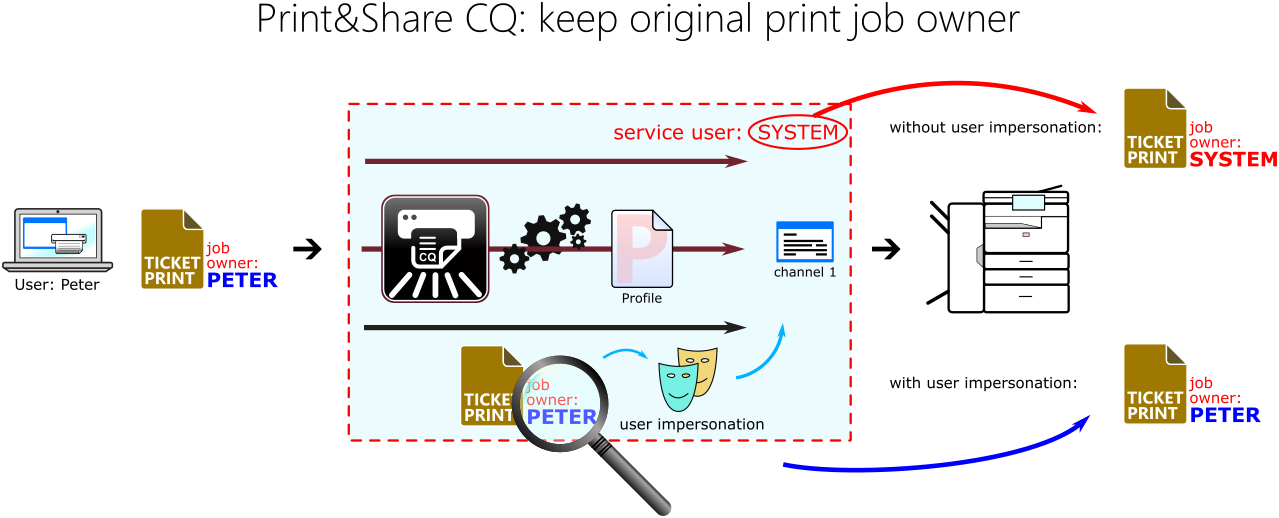
In this article we are going to explain how you can configure Print&Share CQ so that the original print job owner is being used at the (print) output. This technique is called user impersonation.
Configuration
Preparing Print&Share CQ
First, for demonstration purposes, we are going to setup Print&Share CQ with a single profiIe. This profile will have one print channel. In a next section, we will do the actual user impersonation configuration.
- Log in to the admin panel of Print&Share CQ using a web browser.
- Navigate to
Manage > Workflow > Profiles. - Create a profile by clicking Create new and give the profile the name
ImpersonationTest. - Scroll down to the Channels section and add a Printer-channel.
- Configure the Printer-channel with a specific printer.
- Save all settings and go back to the overview of all Profiles.
Note: In case this you have multiple profiles, for testing purposes, change the order of profiles and put this profile as first.
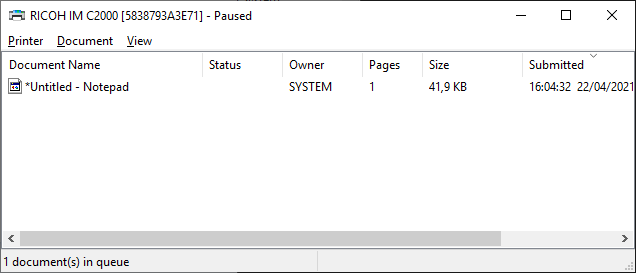
If you now print a document you will see that the print job owner will be the same as the user that runs the Print&Share CQ service. In our case it is running under the SYSTEM user:

To verify this:
- Log on to the server where Print&Share CQ is installed.
- Navigate to
Windows Control Panel > Devices and Printers, right-click on the printer that you used in your profile and selectSee what's printing. - In the Print queue dialog click
Printer > Pause Printing. This will pause the actual print queue (output).
When printing something to Print&Share CQ, the service will execute the profile and the channel and send the job to your configured printer. The print queue of this printer has been set to a Pause-state, allowing us to verify the print job owner. In our case the job owner is SYSTEM. This is exactly what we expected, because our service runs under the System account.
Configuring the user impersonation
- Log in to the admin panel of Print&Share CQ using a web browser.
- Navigate to
Manage > System Setup > User impersonation. - By default the
Impersonation:is set to Disabled. Select the option Impersonate user that printed the job.
By selecting this option, you will be notified that you need to configure the policyAct as part of the operating system. - Click Save to save the user impersonation setting.
What is 'Act as part of the operating system' This is a security policy which allows the operating system to do actions in the name of that user. This is exactly what we need!
Enabling Run As Service Account to Act as the Operating System on the server.
Read the step-by-step guide on how to configure this policy in Windows
Testing
Actually, there is not much to configure.
- On the server you need to add a user to the
Act as part of the Operating System - and in Print&Share you need to enable user impersonation via the option
Impersonate user that printed the job.
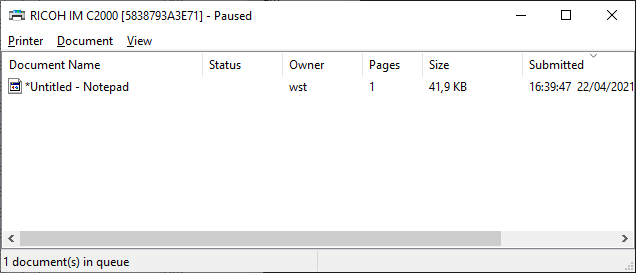
Now we are going to print again our same document and see in our paused print queue on the output which user we have.
As you can see, our user is now wst instead of SYSTEM. The user impersonation is successful!
See also
- Act as part of the operating system docs.microsoft.com