How to add extra overlays
In this case, we will configure Print&Share to add an overlay to the first page, a T&C on the back of the first page, a different overlay to the second page and no overlay on the other pages.
Print&Share configuration
Please follow the steps to build this case:
- Create a new profile containing a channel with print functionality.
- Go to the channel configuration by clicking on the printer icon.
- Set Duplex to vertical, only if the printer supports duplex printing. If this is not the case skip the steps to configure the overlay on the back of the first page.
- Terms and conditions on the back of the first page :
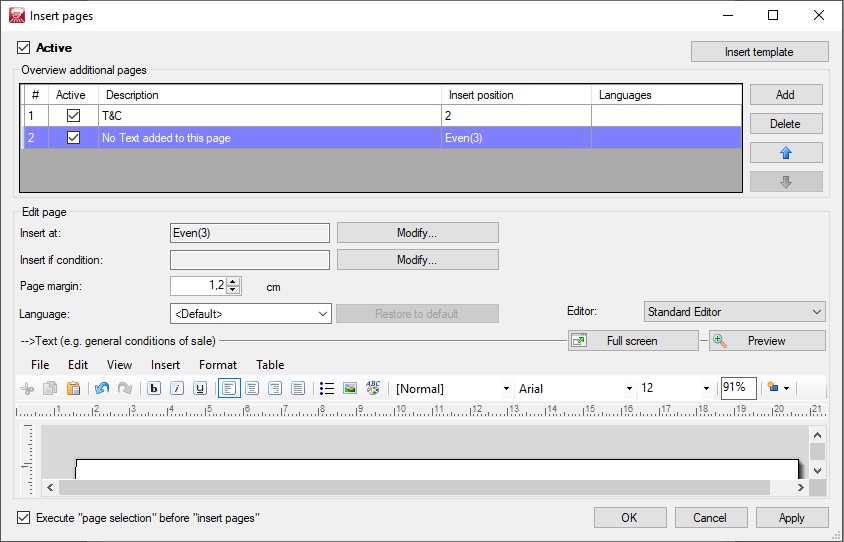
- Click on the Insert pages button.
- Click on the Active option to allow additionales pages.
- Click on the Add button to add a new page to the document.
- Select Make your own page in the new dialog and click the OK button.
- Write down the T&C or other information in the editor part.
- Click on Insert at and enter 2 in the custom option.
- Add a second page and set the insert position to custom : even(3)
- Since this page is to add a white page on the other even pages do not enter text in the editor.

- Close the dialog by clicking the OK button.
- Click on the Get more editor button to add the overlays :
- Click on the Insert overlay button.
- Click on the browse button and select the file (in this example a pdf document) you want to use as an overlay.
- Close the dialog by clicking the OK button.
- Select the overlay in the Added pages overview.
- Set the range to custom: 1.
- Repeat the same steps but set the range to custom:3
- Close the get more editor.
