Introduction
The idea of profiles is that you create several profiles for specific tasks or specific kinds of print jobs. For example: profile x for frequent prints of document 1, profile y for the prints of document 2. Specific tasks of print jobs could be e.g. creating invoices, offers, printing reminders, etc. After the installation, at least one profile has been created for you to get you started. You can either create profiles manually or via a wizard. In both cases, click on the [Change] button (top right corner). You can either click on the [New] button to create a new profile yourself, or let the profile wizard guide by clicking on [Use the Profile Wizard to create a new profile].
The Profile Wizard
The Profile Wizard will take you through the steps of creating a profile : Click on the [Change] button to open the Profile Wizard. Click on [Next>] to go to the next screen. The wizard will take you through the following steps:
- Step 1: Determine the name under Profile name: (e.g. invoicing).
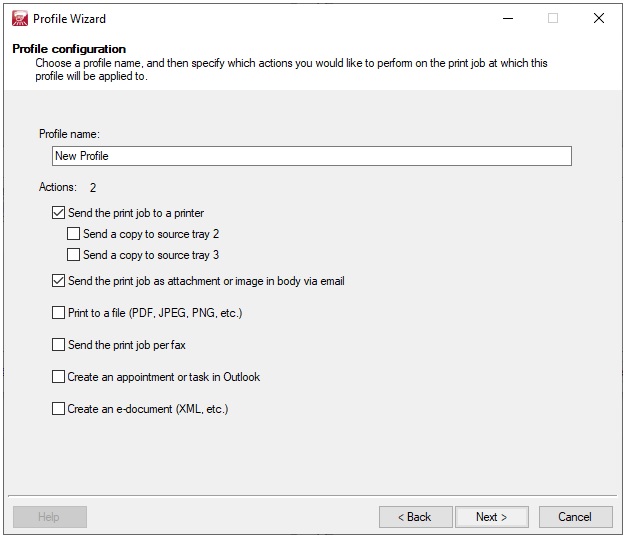
- Select one or more actions in the profile that you want to execute under Actions. In the following example, we will create a profile that can print invoices on a printer, whilst sending these via email at the same time.
- Step 2: These steps depend on the selected items in Step 1. Specify the settings for the respective print.
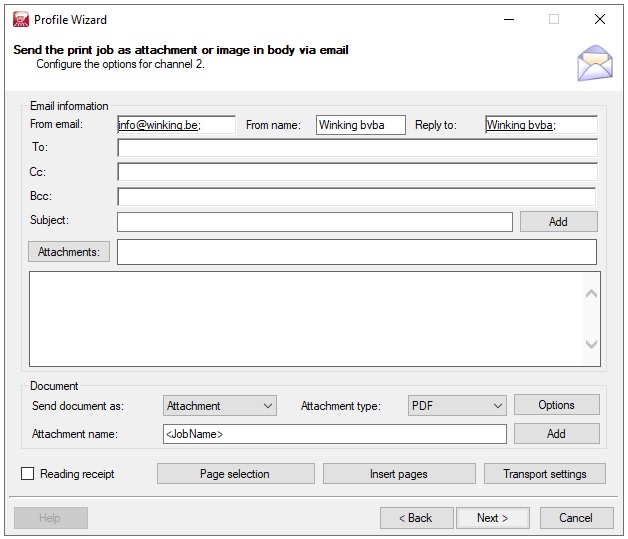
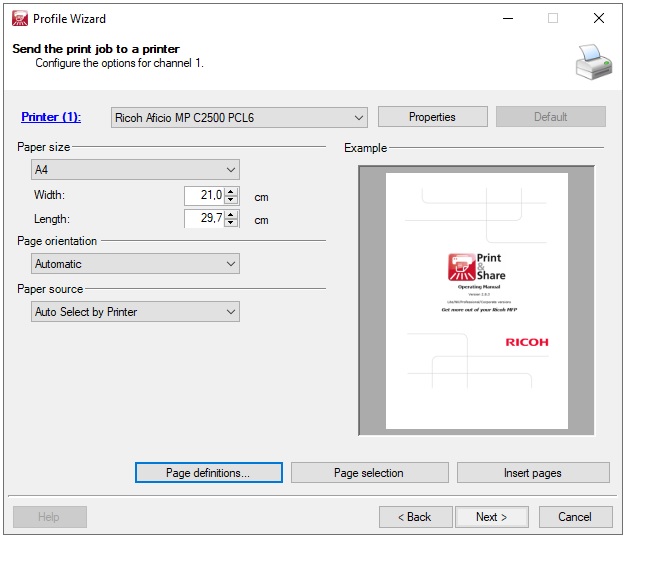 The boxes are identical to those of manual configuration, with the only difference that these steps only apply to the new profile.
 - Step 3: Compose the accompanying email that will be delivered to your correspondent together with the invoice.
- Step 4: After finishing the wizard, an overview of the profile you have just created will appear.
If necessary, you can still make changes to every part of the profile. Click on [OK] to finish the creation of the profile.
Creating profiles manually
- Add a profile
- By clicking on the [Change] button in the top right corner of the Print&Share dialog window, you will immediately be directed to the profile overview.
- Click on the [New] button to create a new profile.
- Next to the method described above, you can also create a new profile by going to the Profile drop down listbox. At the bottom of this list you will find the option [New profile…].
- The program automatically assigns a default name to a newly created profile (New Profile #). You can change this name immediately afterwards.
- Change a profile
- To be able to see what has been included by default in this profile, select the respective profile icon and double click on the icon.
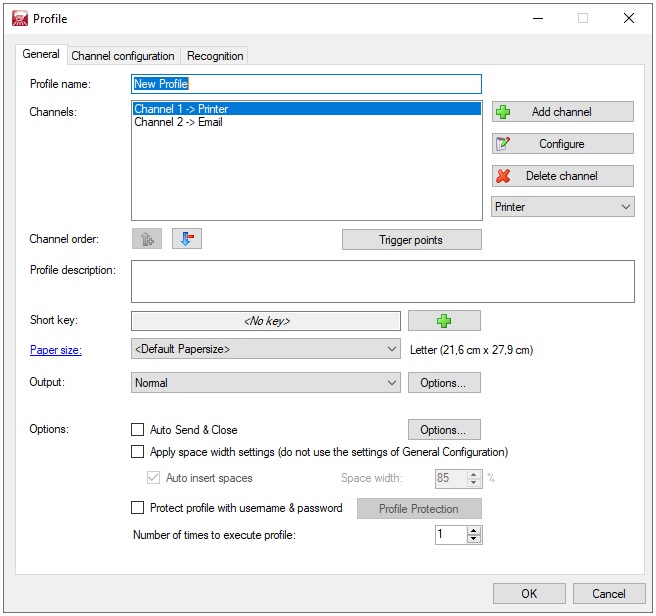
- You will notice that a default print channel has been made for you.
- You can change the function of this channel, or you can add extra channels, each with its own specific function.
- Add channels
- You can add a channel to a profile.
- After adding the channel, you can select its functionality from a drop down list in a dialog window.
- The available functions are: email, fax, printer, File Printer, e-document, Outlook, Lotus Notes and Label Printer.
- For more details about the functions, please consult the chapter Functions further on in this manual.
- If you have chosen a function, click on the [Add channel] button to add the channel to the profile.
- Settings
- A profile can contain many settings.
- We differentiate the following types of settings: general settings, channel configuration settings and recognition settings.
- [General] tab
- On the [General] tab, you can set the general settings of a profile:
- Profile name: You can enter or change the profile name here. The profiles will be arranged alphabetically. *[Add channel]
- You can add a channel by clicking on this button.
- You can determine the function of the channel via the drop down menu.
- [Delete channel]
- You can remove a channel by clicking on this button.
- You can determine the function of the channel that you wish to remove via the drop down menu.
- Channel order
- You can change the order of the channels with the arrow-buttons.
- [Cascade] & [Trigger points]
- Profile description
- You can add a full description of the profile here (target, operation, etc.).
- Short key
- Choose a key or key combination to be able to quickly switch to a specific profile.
- Use the [Add key] and [Delete key] buttons to add/remove keys.
- Paper size
- The standard paper size that has been placed in the printer tray.
- By clicking the [Paper size] label itself, you have the possibility to define Split Templates.
- For a Split Template, you have to define a paper size and orientation. By clicking the button in the document preview you can define how to split the document.
- When the [Split input papers] option is enabled and an incoming print job matches (= same paper size and orientation) a defined template, the job will be split according to that template.
- When multiple templates are defines that have the same paper size and orientation the first one will be used.
- Output:
- [Normal] When you use this setting, print jobs will not be adapted. They will be sent to the printer in the way you have set them in the application.
- By clicking the [Options…] button next to the [Normal]-output selection, you can enable the [Booklet] option. Scanned booklets will be splitted and sorted result in a de-booklet output.
- [Every page in the document is a separate transmission.] The print job will be split up into several print jobs. The pages will be separated per page or by means of a recognition word. The pages will remain to exist in their entirety.
- [Documents are combined into one transmission.] Several individual print jobs can be merged to be printed together. This can be very useful when you e.g. want to merge several print jobs into one single booklet.
- Print&Share works in one channel only with one page size. Switching between sizes during the execution of one combined print job is not possible.
- Options:
- [Auto Send & Close] When this option is active, Print&Share will not appear on your screen anymore. The print job will either immediately be sent to the printer or on the basis of a recognition word.
- [Apply space width settings (do not use the settings of General Configuration)]. This setting is useful when you are detecting data from the print job. E.g. when words stick together, you can determine the space width with this option.
- [Protect profile with login] To prevent undesired changes to the profile, you can protect the profile with a password.
- [Number of times to execute profile] This setting allows you to set the number of times the profile should be executed. This feature can also be described as a profile loop.